Thank you for choosing Antelope Audio!
The activation of Discrete 8 Oryx is required to validate your product warranty.
Internet connection is required for successful product activation.
Thank you for choosing Antelope Audio!
The activation of Discrete 8 Oryx is required to validate your product warranty.
Internet connection is required for successful product activation.
To activate your device, you will need to have an Antelope account.
To create an account, please click here.
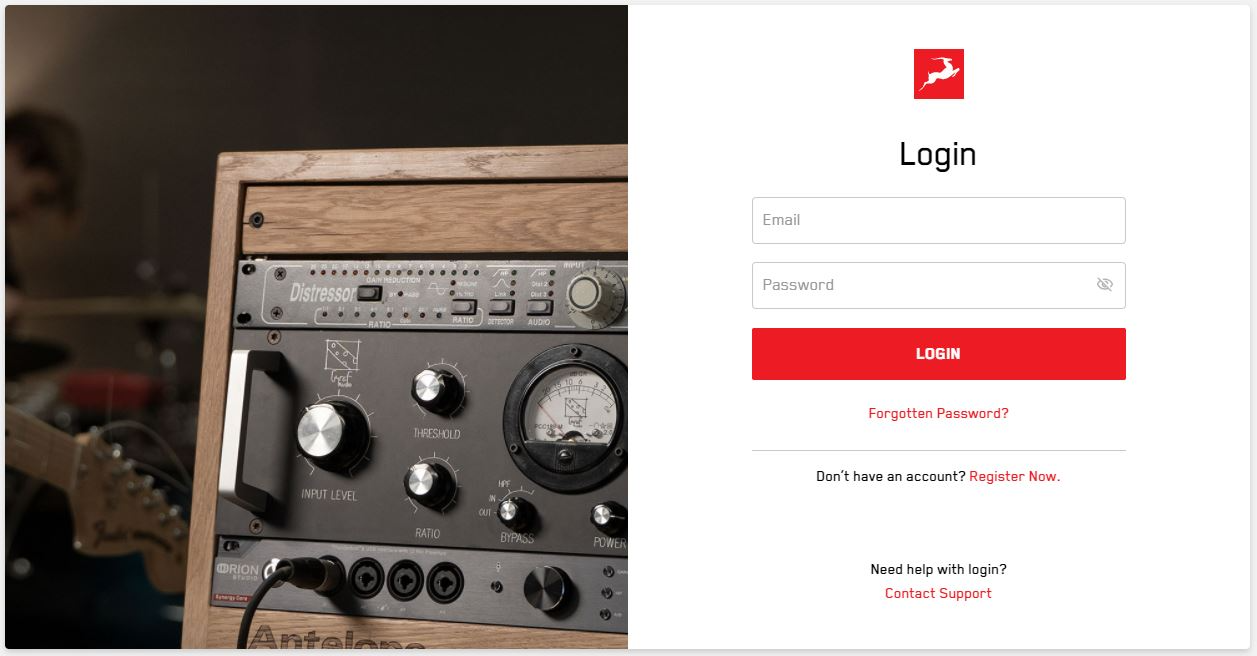
Existing users can log in here.
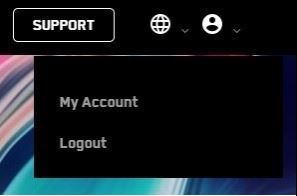
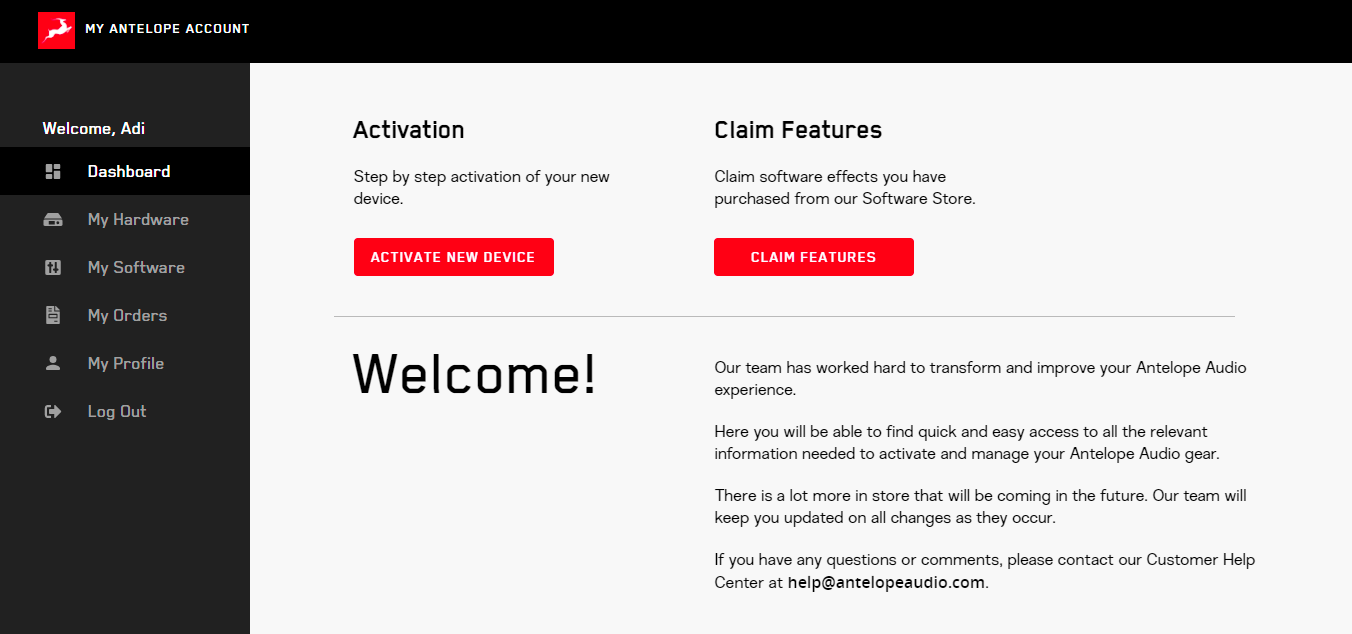
Once you have logged in, click on My Account in the top right to access the user Dashboard
Click on the Activate New Device button on the main Dashboard.
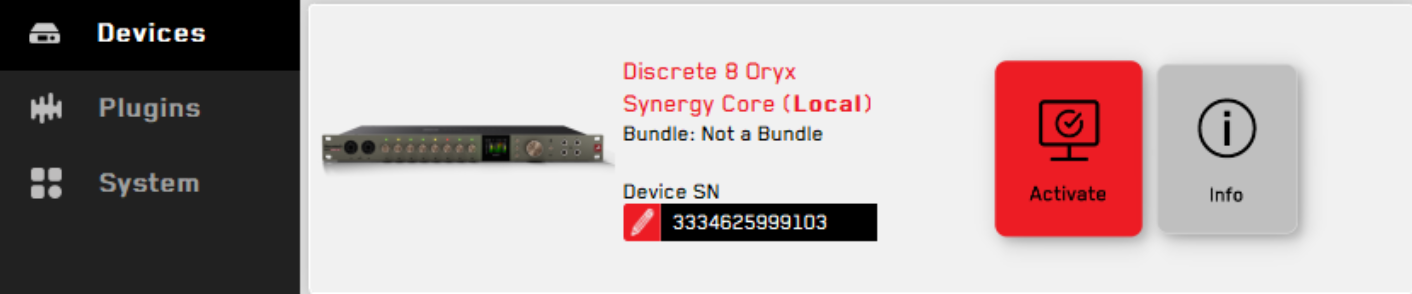
Choose Discrete 8 Oryx from the device list: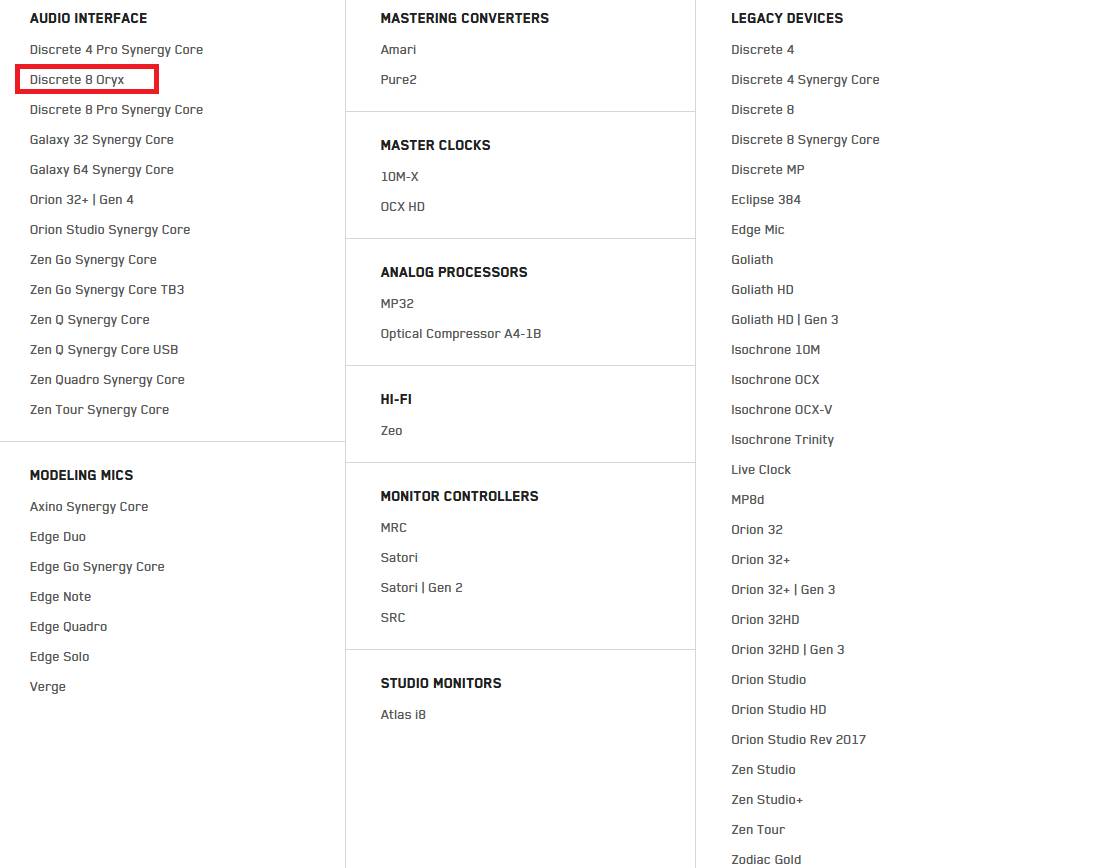
* If you already have the Antelope Launcher installed – make sure you are running version 3.3.0 or later, as well as the latest available Manager Server version in the System tab. To update the Antelope Launcher, click Check for updates in the application’s settings menu.
Once in the Antelope Launcher, connect your Discrete 8 Oryx to your computer via the provided USB cable. Click the Activate button and follow the onscreen instructions.
Step 3. After the device activation, click on "Manage Device" to install the latest software bundle. This step is mandatory to install the latest firmware and control panel for your device.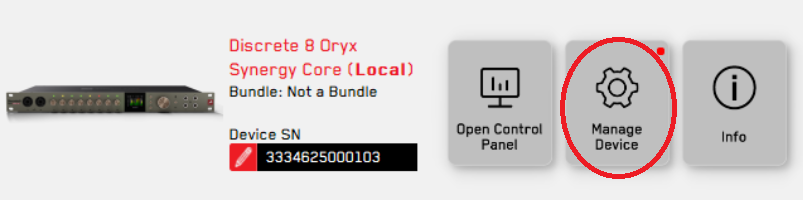
* On Windows – this step will also install the latest driver for your device. 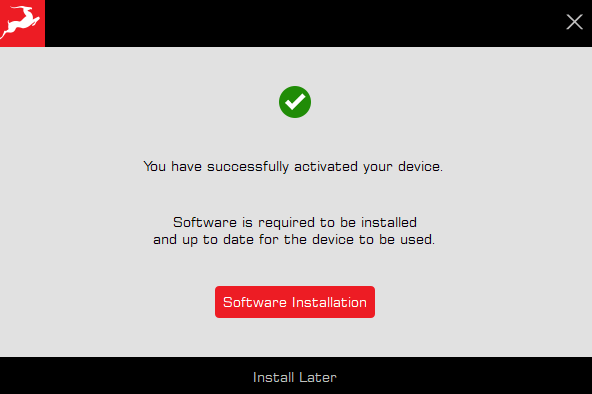
Step 4: Activate your product warranty
To activate your product warranty, navigate to the My Warranty tab in My Antelope Account.
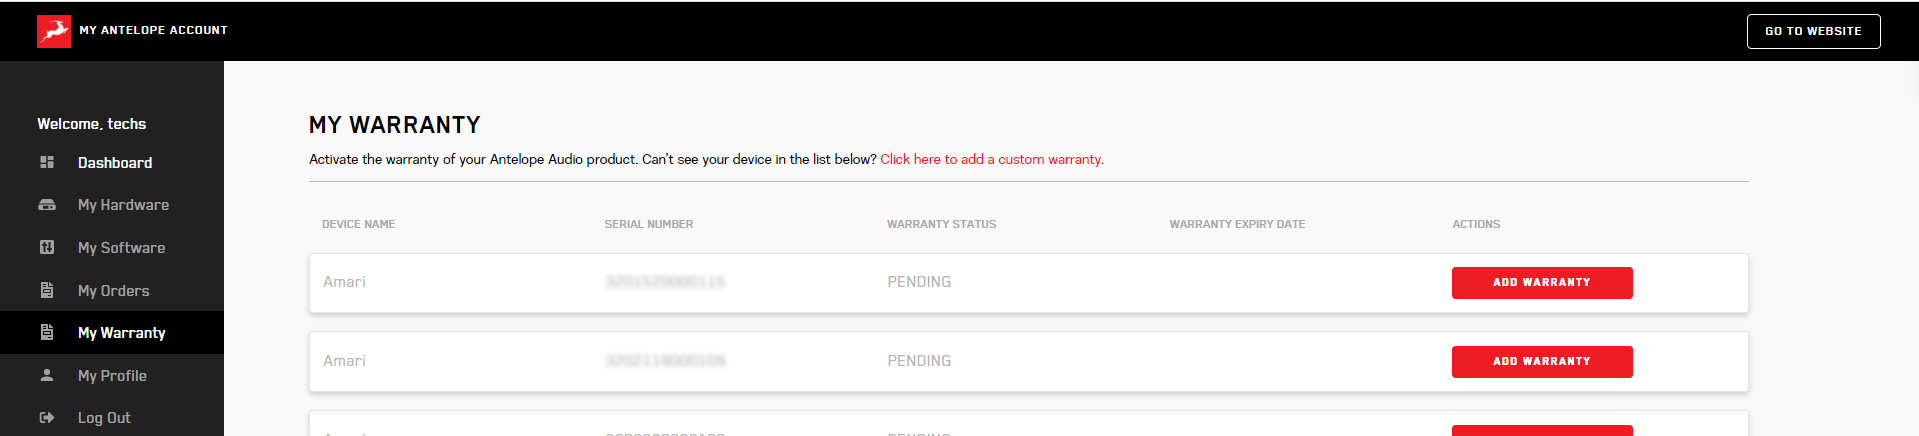
If you have successfully activated your product, it should now appear under My Warranty. Click on Add Warranty.
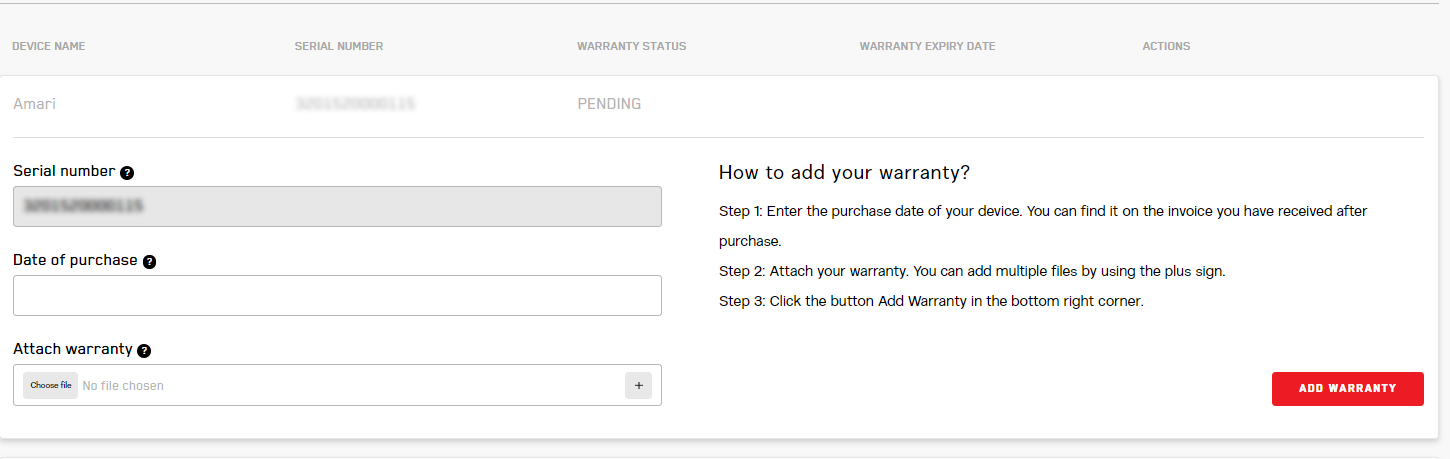
On the following screen you will be asked to enter information about your new device and to attach proof of purchase.
You can add multiple files (up to five) by using the plus sign.
Acceptable formats are .pdf, .jpg, .png, .jpeg, .heif, and the size limit is 7 MB per file.
Once you have completed the steps click Add Warranty.

After successfully completing the process, you can click on View Warranty to see if your file has been uploaded correctly.
You are set and ready to use your new remote!
Need any help?
Visit the Antelope Audio Customer Support page, choose your device and find the required information.
Configuring for Windows 10
To optimize Discrete Oryx for Windows 10/11 audio playback and recording:
1. Enter the ‘Sounds’ options window from the Control Panel; or right-click the speaker icon in the system tray and choose ‘Open Sound settings’.
2. Make sure the Discrete 8 Oryx is selected under 'Output' and 'Input':
● Under 'Output', the interface should be listed as ' Discrete Oryx USB Audio Driver Playback 1/2'. There will be 4 pairs of playback devices available.
● Under 'Input', the device should be listed as ' Discrete Oryx USB Audio Driver Recording 1/2'. There will be 4 pairs of recording devices available.
3. Click 'Device Properties' under 'Output'. Then, click 'Additional Device Properties'.
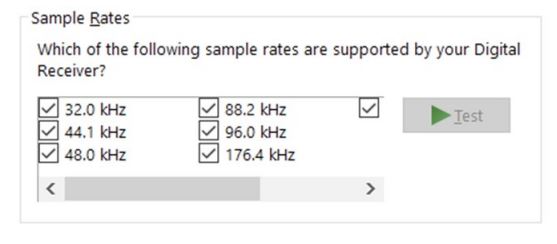
4. Go to the ‘Supported Formats’ tab and check all the available sample rates.
5. Enter the ‘Enhancements’ tab and disable all enhancements.
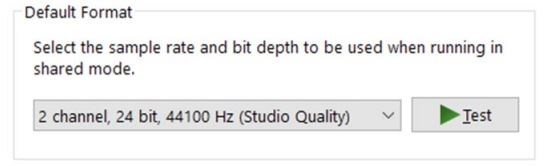
6. Enter the ‘Advanced’ tab and choose any of the available “2 channel, 24-bit” modes from the drop-down menu. Click ‘OK’ to close the window.
7. Back in Sound settings, click 'Device Properties' under 'Input'. Then, click 'Additional Device Properties'. Enter the 'Enhancements' tab and disable all enhancements. Click 'OK' to close the window.
Tips
● If you are experiencing interruptions or failure when using your DAW and trying to playback audio from your OS at the same time, make sure that the device sample rate matches the one of your DAW session.
● In some cases, disabling the ‘Exclusive mode’ functionality from the ‘Advanced’ tabs might help when running multiple playback applications at the same time.
● Disabling the 32kHz sample rate isn’t mandatory, but it might help in general.
Further Reading - Antelope Audio Knowledge Base Windows 10 Optimization
Configuring for macOS (10.14 and later)
The security settings in macOS (10.14 and later) may result in no input signal reaching your DAW, despite having everything set up correctly.
These steps apply when you are using the Discrete 8 Oryx in a DAW for the first time:
1. Launch your DAW and choose Discrete 8 Oryx as the input device. The following dialog box will appear (if using Ableton Live 10 Suite, for example):
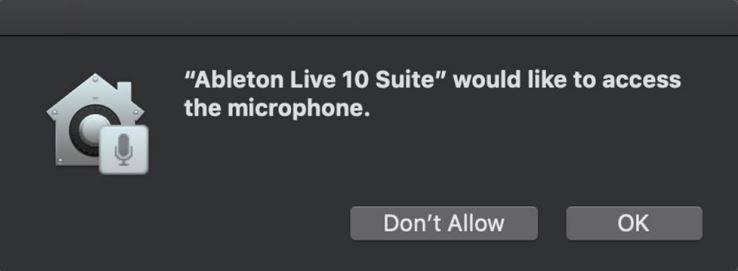
2. Click 'OK', and your DAW should function normally.
However, if the events above did not occur for some reason, or you are using multiple DAWs, you’ll need to adjust settings manually in 'Security & Privacy':
1. Click the 'Apple' symbol and choose 'System Preferences'. Head to the 'Security & Privacy' settings menu.
2. Click the 'Privacy' tab. In the column on the left, choose ‘Microphone’. Make sure there's a checkmark next to any DAW you want to use.
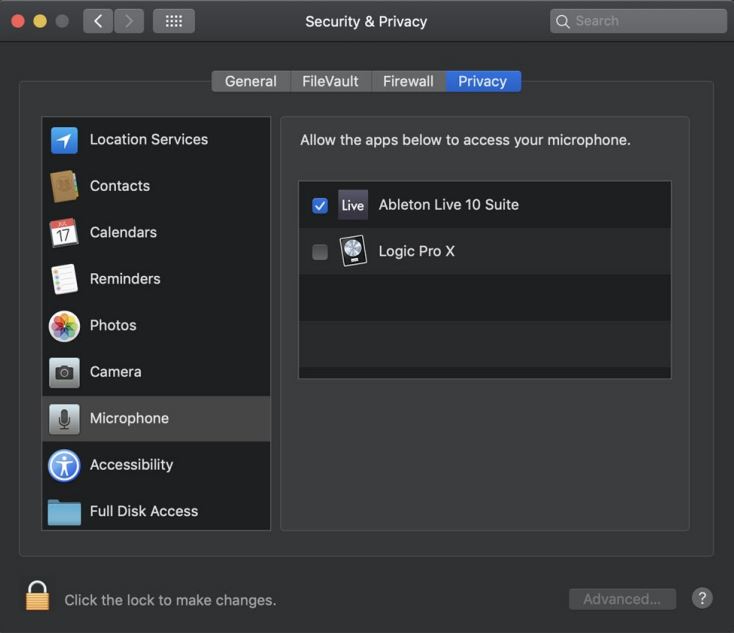
Note: You may have to click the padlock symbol in the bottom left corner and enter your password to make changes
Install the Unified Driver for macOS
Discrete 8 Oryx is a Class Compliant device and can run straight out of the box without driver installation. However, we recommend installing the Antelope Unified Driver following the steps below to ensure optimal performance and stability. Navigate to the SYSTEM tab in the Antelope Launcher and click Install on the latest available Bundle version for the Antelope Unified Driver: To allow the Unified Driver on macOS 10.15 Catalina, 11 Big Sur or 12 Monterey, visit this article.
To allow the Unified Driver on macOS Ventura and Sonoma, visit this article.
To allow the Unified Driver on Apple Silicon computers, visit this article.
System Requirements:
Mac:
Windows: